Challenge 1: Create the infrastructure
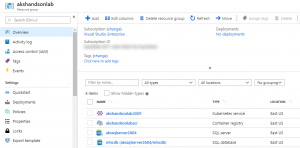
Task Now you have all the required azure components to follow this lab. Note: in case needed you have to create the Application ID (it is recommended to complete this task from the Azure CLI). Note: In case you access the portal and you don't see the project you may need to switch directory in the Azure DevOps portal.
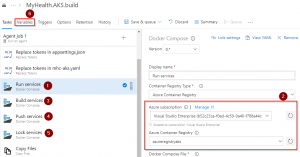
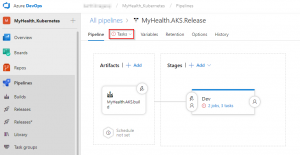
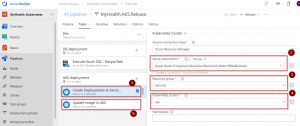
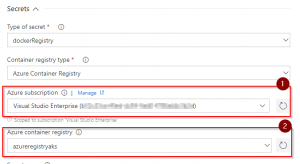
Task 2: Configure Build and Release pipeline Lets go to Azure DevOps and we will manually map Azure resources such as AKS and Azure Container Registry to the build and release definitions. You will be prompted to authorize this connection with Azure credentials. Disable pop-up blocker in your browser if you see a blank screen after clicking the OK button, and please retry the step.
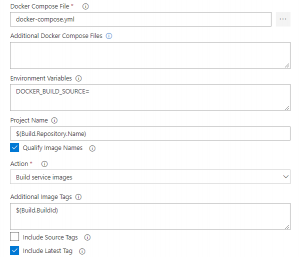
Tasks Usage Replace tokens replace ACR in mhc-aks.yaml and database connection string in appsettings.json Run services prepares suitable environment by pulling required image such as aspnetcore-build:1.0-2.0 and restoring packages mentioned in .csproj Build services builds the docker images specified in a docker-compose.yml file and tags images with $(Build.BuildId) and latest Push services pushes the docker image myhealth.web to Azure Container Registry Publish Build Artifacts publishes mhc-aks.yaml & myhealth.dacpac files to artifact drop location in Azure DevOps so that they can be utilized in Release Definition applicationsettings.json file contains details of the database connection string used to connect to Azure database which was created in the beginning of this lab. mhc-aks.yaml manifest file contains configuration details of deployments, services and pods which will be deployed in Azure Kubernetes Service. The manifest file will look like as below For more information on the deployment manifest, see AKS Deployments and YAML manifests
Task 3: Trigger a build and deploy application In this exercise, let us trigger a build manually and upon completion, an automatic deployment of the application will be triggered. Our application is designed to be deployed in the pod with the load balancer in the front-end and Redis cache in the back-end.
The deployed web application is running in the displayed pods. Access the Kubernetes web dashboard in Azure Kubernetes Service (AKS) Kubernetes includes a web dashboard that can be used for basic management operations. This dashboard lets you view basic health status and metrics for your applications, create and deploy services, and edit existing applications. Follow these instructions to access the Kubernetes web dashboard in Azure Kubernetes Service (AKS).
Task 4: Configure Application Insights
In this taks we have the existing ASPNET.NET Core application, when creating all the infrastructure for the labs, we will need the newly created Instrumentation key to be configured in this project so Application Insights can work.
Note: If the Application Insights service is not created, create a new one.
Note: In this file we give the startup options for the website, we need
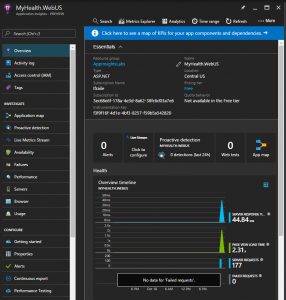
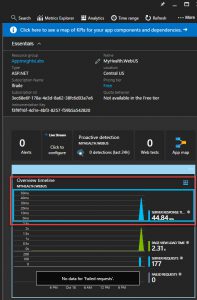
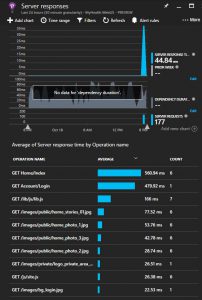
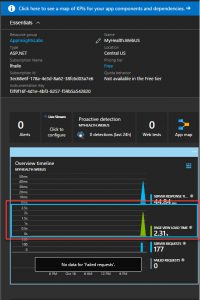
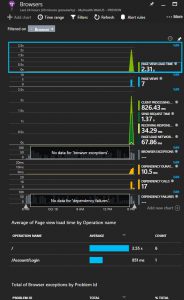
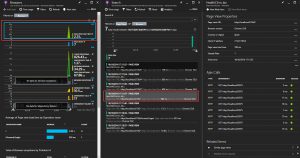
Lets double check theApplication Insights for Kubernetes Enricher its enable. The code should include something like this: Task 5: View telemetry Exercise Now that we have configured the application to send telemetry data to Application Insights, let’s review how to send the date and see the telemetry from the Azure Portal. Lets go the portal opens on a view of the telemetry from your app. This opens the azure blade with all the information about the server response time of all the calls which have ocurred to the application, and its times. So we can detect for example bottlenecks in our application in particular pages. We have a lot of other metrics avaliable, like Page view load time which measures times from client side informing how long the pages take to load in the client side. Click again, in this new blade in Page View Load Time in the upper part, you can continue drilling down through all the information in Application Insights.
A: Setup your infrastructure / environment
i. Get the latest available
Kubernetes version in your preferred region into a bash variable. Replace with the region of your choosing, for
example eastus.
version=$(az aks
get-versions -l Eastus2 –query 'orchestrators[-1].orchestratorVersion' -o tsv)
ii. Create a Resource Group
az group create –name akshandsonlab –location Eastus2
iii. Create AKS using the latest version available
az aks create –resource-group akshandsonlab –name RugamitasAKS01 –enable-addons monitoring –kubernetes-version 1.14.5 –generate-ssh-keys –location EastUS2
Important: Enter a unique AKS cluster name. AKS name must contain between 3 and 31 characters inclusive. The name can contain only letters, numbers, and hyphens. The name must start with a letter and must end with a letter or a number. The AKS deployment may take 10-15 minutes
az acr create –resource-group akshandsonlab –name RugamitasACR01 –sku Standard –location EastUS2
Important: Enter a unique ACR name. ACR name may contain alpha numeric characters only and must be between 5 and 50 characters
# Get the id of the service principal configured for AKS
CLIENT_ID=$(az aks show –resource-group akshandsonlab –name RugamitasAKS001 –query “servicePrincipalProfile.clientId” –output tsv)
# Get the ACR registry resource id
ACR_ID=$(az acr show –name RugamitasACR01 –resource-group akshandsonlab –query “id” –output tsv)
# Create role assignment
az role assignment create –assignee $CLIENT_ID –role acrpull –scope $ACR_ID
For more information see document on how to Authenticate with Azure Container Registry from Azure Kubernetes Service
az sql server create -l EastUS2 -g akshandsonlab -n rugamitassql01 -u sqladmin -p P2ssw0rd1234
Create a database
az sql db create -g akshandsonlab -s rugamitassqlQL01 -n mhcdb –service-objective S0
Important: Enter a unique SQL server name. Since the Azure SQL Server name does not support UPPER / Camel casing naming conventions, use lowercase for the DB Server Name field value.


Challenge 2 – Continuous Deployment to Azure

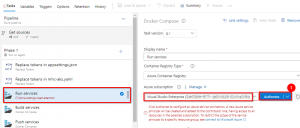
This creates an Azure Resource Manager Service Endpoint, which defines and secures a connection to a Microsoft Azure subscription, using Service Principal Authentication (SPA). This endpoint will be used to connect Azure DevOps and Azure.
Tip: If your subscription is not listed or to specify an existing service principal, follow the Service Principal creation instructions.
![]()
![]()
![]()
![]()

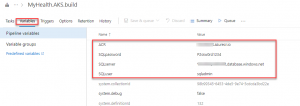
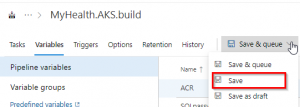

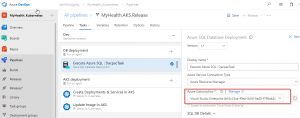
Note: The Database Name is set to mhcdb and the Server Admin Login is sqladmin and Password is P2ssw0rd1234. If you have entered different details while creating Azure SQL server, update the values accordingly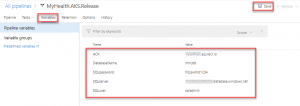
kubectl get service mhc-front –watch
Challenge 3: Enable Aplication Insights (optional)
“InstrumentationKey”: “YOUR_INSTRUMENTATION_KEY”
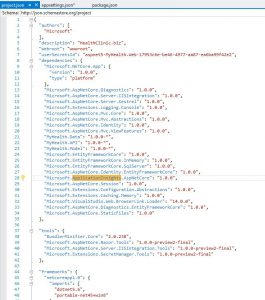
to configure Application Insights to read the configuration.
Unlike the setup for other Application Insights SDKs, adding the SDK doesn’t
automatically configure a range of modules to collect different kinds of
telemetry. We’re going to add the modules for Telemetry and Exception so we
need to do a couple of modifications to the Startup.cs
This will load the configuration for Application Insights from the
configuration file for the site.
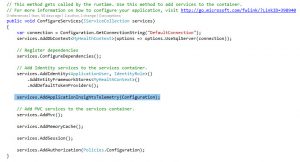
public void ConfigureServices(IServiceCollection services)
{
    ...
    services.AddApplicationInsightsTelemetry("----Your Application Insights Instrumentation Key ----");
    services.AddApplicationInsightsKubernetesEnricher();
    services.AddMvc();
    ...
}
*app.UseApplicationInsightsRequestTelemetry();
*app.UseApplicationInsightsExceptionTelemetry();
With these two lines we are configuring the application to send Telemetry information as well as Exception information to the configured Application Insights.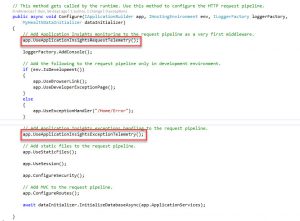
application and open it.
Note: We need to
configure also the client-side reporting of Application Insights
telemetry, which will allow us to have telemetry data of what is happening
at the client side of our web application.
This _Layout.cshtml page in ASP.NET is the base page for all the rest
of the pages for the application, so adding this code here will add the
code in the rest of the pages of the application at runtime.
Microsoft.ApplicationInsights.Extensibility.TelemetryConfiguration
TelemetryConfiguration. This injects the configuration part
of Application Insights to be available for the client-side scripting.![]()
This will add the needed Javascript code in the page so Application
Insights client-side telemetry sends information about client-side
execution.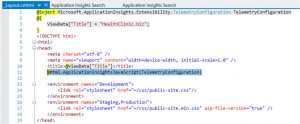
3: Viewing Telemetry